
Can Fiber Laser Machines Mark Plastics? Materials, Results and Limitations

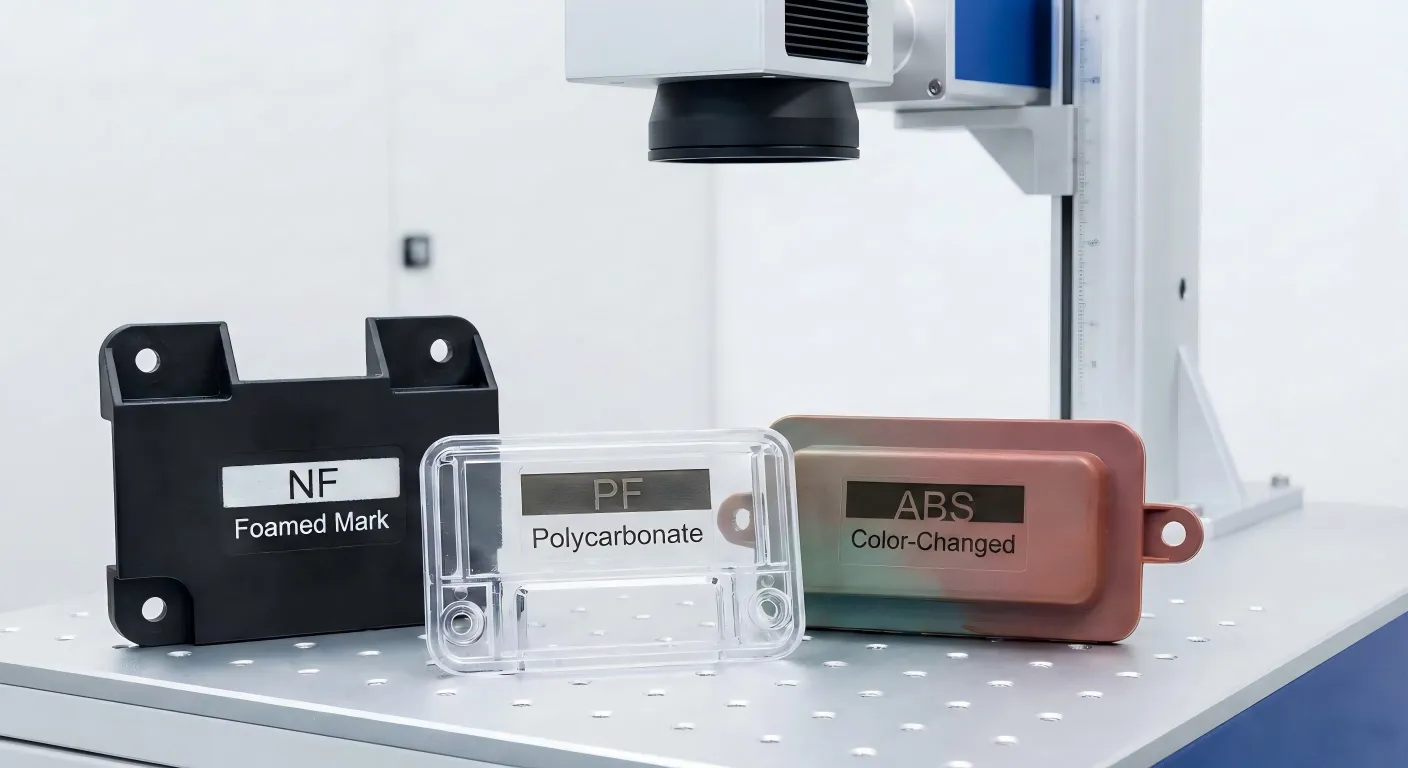
Fiber laser marking machines have a reputation as metal markers. They are famous for engraving serial numbers on steel, logos on aluminum, and hallmarks on jewelry. So when someone asks, “Can I use my fiber laser on plastic?” the answer often sounds like it should be a simple no.
The real answer is more interesting: yes, a fiber laser can mark many plastics, but results depend heavily on the type of plastic, its color, the additives inside it, and your laser settings. Some plastics mark beautifully. Some barely react. And a few should never be laser marked at all, because of the toxic fumes they release.
In this guide, you will learn whether fiber laser machines can mark plastics, which materials work and which do not, what kind of results to expect, the main limitations, how to test safely, and when another type of laser may be a better choice. Everything is explained in plain and simple language.
The Short Answer
- Yes, fiber lasers can mark many plastics, especially engineering plastics such as ABS, polycarbonate, and nylon, and plastics that contain additives that absorb laser light.
- Results vary a lot. Some plastics give clear, dark, or light marks. Others give weak, uneven, or melted marks.
- Some plastics are unsuitable or unsafe, such as PVC and PTFE, which release harmful fumes when heated.
- Other lasers can be better. CO2 and UV lasers often handle plastics more easily than fiber lasers.
- Always test first, on a sample of the exact plastic you plan to mark.
Why Plastics Are Different from Metal
To understand the results, it helps to know how a fiber laser works and how plastics behave.
A fiber laser produces light at a wavelength of about 1064 nanometers, which is in the near-infrared range. Metals absorb this wavelength well, which is why fiber lasers work so well on them.
Plastics are different.
- Many plastics do not absorb 1064 nm light well. The beam can pass through them or reflect without much effect, especially in clear and light-colored plastics.
- Plastics melt and burn at much lower temperatures than metals. Too much heat can cause melting, bubbling, warping, or burning.
- Plastics contain additives, such as pigments, fillers, and flame retardants, that change how they react to the laser.
- Heat does not spread out as quickly as it does in metals, so heat can build up in one spot.
Because of these differences, marking plastic is a balance between delivering enough energy to change the surface and not so much that it damages the part.
How a Fiber Laser Marks Plastic
When a fiber laser does mark plastic, it usually works in one of these ways.
1. Carbonization (Darkening)
The laser heats the plastic enough to partly burn the surface, leaving a dark, carbon-rich mark. This works well on certain light-colored plastics that carbonize easily, such as polycarbonate. The mark is usually dark gray or black.
2. Foaming (Lightening)
The laser melts a thin layer of the plastic and creates tiny gas bubbles inside it. These bubbles scatter light and make the area look lighter or whiter. This often works on dark plastics, giving a light mark on a dark background.
3. Color Change
Pigments or additives inside the plastic can change color when heated by the laser. For example, a dark pigment may bleach out, or a light additive may darken, producing contrast without removing material.
Surface Removal (Ablation)
The laser removes a very thin layer of plastic, a coating, or paint. This changes the surface texture or reveals a different color beneath.
5. Engraving
With enough energy, the laser removes material to create a recessed mark. On plastics, this can be difficult to control, because melting often leaves rough edges.
The method depends on the plastic and the settings, and in many cases it is a mix of several effects.
If you want to understand how these effects relate to metal marking, read our guides on the difference between engraving, etching, and printing and black marking vs. surface engraving on stainless steel.
Which Plastics Can a Fiber Laser Mark?
Here is a general guide. Results depend on the exact grade, color, and additives, so always test.
Plastics That Often Mark Well
- ABS. A very common engineering plastic. It often marks well, with results that depend on color and additives.
- Polycarbonate (PC). Often carbonizes to give a dark, high-contrast mark.
- Nylon (PA). Marks reasonably well in many grades, especially colored or filled nylons.
- PBT. A common plastic in electronics, which often marks well.
- PC/ABS blends. Common in housings and often respond well.
- Some filled or glass-filled plastics. Fillers and pigments can improve laser response.
- Plastics with laser-sensitive additives. Many manufacturers add special pigments to help lasers mark. These are often marked as “laser-markable.”
Plastics That Can Be Difficult
- Polyethylene (PE) and polypropylene (PP). These often respond poorly to fiber lasers, giving faint or uneven marks.
- Acrylic (PMMA). Often clear, so the fiber laser beam may pass through it without much effect. Other lasers usually work better.
- Clear or transparent plastics in general. They often do not absorb enough 1064 nm light.
- Soft plastics, rubber, and silicone. They may melt or deform, and marks can be inconsistent.
- POM (acetal). Can be marked in some cases, but results vary and heat can cause problems.
- PET. Results vary with grade and additives.
Plastics You Should Not Laser Mark
- PVC (polyvinyl chloride). Heating PVC releases hydrogen chloride and other harmful gases, which are toxic and corrosive. They can harm your health and damage your laser, lens, and extraction system.
- PTFE (Teflon). Heating PTFE releases toxic fumes.
- Plastics containing halogen-based flame retardants or other unknown additives that may release harmful gases.
- Any plastic you cannot identify. If you do not know what a plastic is, do not mark it until you have checked.
Always check the material safety information from the manufacturer before laser marking any plastic.
How Color and Additives Affect Results
The color and additives in a plastic often matter more than the base plastic itself.
- Black plastics often contain carbon black, which absorbs light well. They may give a light mark through foaming or bleaching.
- White plastics often contain titanium dioxide, which reflects light. Marks may be weak, unless the plastic has laser-sensitive additives.
- Colored plastics vary, depending on the pigment.
- Clear plastics usually transmit the beam, with little effect.
- Laser-markable grades contain additives made to absorb laser light and change color in a controlled way, giving the best results.
- Fillers, such as glass fiber, can change how the plastic reacts and how the mark looks.
Because of this, two parts made from the same base plastic can mark very differently. Always test the actual part or an identical sample.
What Results Can You Expect?
Here is a realistic picture of what fiber laser marking on plastic can look like.
Good Results
- Clear, readable text and logos with good contrast
- Permanent marks that do not rub off
- Fine detail, on suitable plastics with careful settings
- Barcodes and QR codes that scan reliably, with the right contrast
- Marks without ink, labels, or consumables
Common Problems
- Low contrast. The mark barely differs from the surrounding plastic.
- Melted or rough edges. Heat spreads and softens the plastic around the mark.
- Bubbling or foaming where you did not want it
- Burn marks or yellowing around the mark
- Warping or distortion on thin parts
- Uneven results across a batch, due to differences in the plastic
- Sticky or tacky residue from melted plastic
Most of these problems come from too much energy, poor focus, or an unsuitable plastic.
Fiber Laser Settings for Plastics
Marking plastic is a gentle process. The goal is to change the surface with as little heat as possible. Exact settings depend on your machine, lens, and plastic, so testing is always needed. But these principles apply to most plastics.
- Use low power. Plastics need far less energy than metals, and too much power quickly melts and burns them.
- Use fast speed. Fast movement limits how much heat builds up in one spot.
- Test frequency carefully. Changing frequency changes pulse energy and heat, and it often has a strong effect on the color and look of the mark on plastic.
- Consider a short pulse width, if your laser allows it. MOPA lasers, which have adjustable pulse width, often handle plastics better than standard lasers, because shorter pulses reduce heat spread.
- Use wider hatch spacing than you would on metal, to avoid stacking heat. Our guide on laser hatch spacing and how it affects mark quality explains how to choose a good value.
- Use as few passes as possible.
- Use a small, controlled defocus, if needed, to spread the energy and reduce burning.
- Allow cooling between marks on small parts.
Our guide on how to choose the right marking speed and power for fiber lasers explains how these settings work together, and our guide on how to choose the right fiber laser marking lens explains how the lens affects spot size and energy density.
Step-by-Step: How to Test and Mark a Plastics Safely
Step 1: Identify the Plastic
Find out exactly what the plastic is. Check the part, the supplier’s information, and any material markings. If you cannot identify it, do not mark it until you can.
Step 2: Check the Safety Information
Look at the material safety data sheet or the supplier’s guidance. Pay special attention to the possibility of toxic fumes. Never mark PVC or PTFE.
Step 3: Prepare the Part
- Clean the surface with soap and water, then dry completely.
- Avoid harsh solvents that may damage some plastics.
- Hold the part firmly with a fixture, such as our fixture table for fiber laser marking machines.
- Keep the surface level and in focus.
Step 4: Set Up Fume Extraction
Plastics produce smoke and fumes when marked. Run strong, effective extraction every time. Make sure the air is moved away from you and the machine.
Step 5: Prepare Your Design
Use a simple, clean design with bold shapes. Our guide on how to create and import vector files for laser marking explains how to prepare clean artwork.
Step 6: Start With Very Gentle Settings
Begin with low power, high speed, and a mid-range frequency. It is much safer to start light and increase than to start strong and melt the part.
Step 7: Build a Test Grid
Mark a grid of small squares on a scrap piece of the same plastic, changing one setting along each direction. For example:
- Change frequency along the rows.
- Change speed or power along the columns.
- Keep everything else the same.
Label each square.
Step 8: Inspect the Results
Look carefully under good light and magnification. Check for:
- Contrast and readability
- Melted or rough edges
- Bubbling, burn marks, or yellowing
- Warping or distortion
- Sticky residue
Step 9: Choose and Refine
Pick the setting that gives the best mark with the least energy. Fine-tune with smaller steps, changing one setting at a time.
Step 10: Save Your Settings
Write down the plastic type, color, supplier, lens, focus, and settings. Retest whenever the plastic, color, or supplier changes.
Step 11: Mark the Final Part
Double-check the fixture, focus, and extraction. Mark, then inspect the part. Let it cool and clean away any residue gently.
Barcodes and QR Codes on Plastic
Many people want to mark codes on plastic housings and parts. This is possible, but contrast is the biggest challenge.
- Test the mark with your real scanner.
- Make sure the marked areas are solid, with no melted or rough edges.
- Use a clean, simple code and enough size.
- Check that the contrast is strong in the lighting where it will be read.
Our guides on how to create permanent QR codes with a fiber laser marker, how to improve QR code readability on small metal components, and how to mark barcodes on metal without losing scanning accuracy explain principles that also apply to plastic.
Curved and Uneven Plastic Parts
Many plastic parts are curved or have different heights. A standard 2D setup may struggle with strong curves.
- Use the flattest area of the part.
- Keep marks small on curves.
- Use a rotary axis for round parts. See our guide on how to mark logos on rings and other small curved objects.
- Consider a 3D system for strongly contoured parts. Our guide on the difference between 2D and 3D laser marking explains when that is worth it.
Limitations of Fiber Laser on Plastic
Be honest about what a fiber laser cannot do well.
- Many plastics do not absorb 1064 nm light well, which limits marking on clear, white, and some colored plastics.
- Heat damage is a constant risk. Melting, warping, and burning can ruin a part.
- Contrast can be low, especially on plastics without additives.
- Results vary between batches, colors, and suppliers.
- Fine detail may suffer from heat spread.
- Some plastics release harmful fumes, which require strong extraction and can rule out marking entirely.
- Deep engraving is difficult, because plastics melt instead of cleanly vaporizing.
- Clear and transparent plastics are especially hard.
- Not every fiber laser is equally good. Lasers with adjustable pulse width often do better.
Other Lasers That Work Better on Plastic
If your main work is plastic, another laser type may suit you better.
CO2 Lasers
CO2 lasers work at about 10,600 nm, a wavelength that most plastics absorb very well. They are excellent for engraving and cutting many plastics, acrylic, wood, leather, and paper. They are usually not suitable for marking bare metals.
UV Lasers
UV lasers work at about 355 nm, which is absorbed strongly by many plastics and produces very little heat, a process often called “cold marking.” They give very fine, clean marks on a wide range of plastics, including many that fiber lasers struggle with, and they also work on glass and some other materials. They cost more than fiber lasers.
Fiber Lasers
Fiber lasers remain the best choice for most metals, and they can mark many plastics, especially engineering grades and plastics with additives.
Which Should You Choose?
- Mostly metal, occasional plastic: a fiber laser, tested on your plastics
- Mostly plastic, acrylic, wood, or leather: a CO2 laser
- Fine, clean marks on many plastics and sensitive materials: a UV laser
- A mix of materials: consider your main material first, and check with your supplier
If you are not sure which machine suits your needs, our team can help you choose from our fiber laser marking machines.
Other Ways to Improve Marking on Plastic
If your plastic does not mark well with a fiber laser, there are other options.
- Use laser-markable grades of plastic, which contain additives made for laser marking.
- Use laser-sensitive coatings or paints, which react to the laser and give strong contrast.
- Use a different marking method, such as pad printing, inkjet, or labels, if laser marking is not suitable.
- Change the material or the color of the part, if you can.
Laser Safety
Fiber lasers and marking plastic both need serious safety care.
- Wear laser safety glasses rated for 1064 nm.
- Use strong fume extraction every time you mark plastic. Plastic smoke can contain irritating and harmful substances.
- Never mark PVC, PTFE, or unknown plastics.
- Keep the area well ventilated.
- Keep a fire extinguisher nearby. Plastics can catch fire if overheated.
- Never leave the machine unattended while marking plastic.
- Keep the machine away from children and untrained people.
- Follow your machine manufacturer’s safety instructions.
Troubleshooting Common Problems
The Mark Is Very Faint or Invisible
- The plastic may not absorb 1064 nm light well
- Check the focus
- Increase power slightly, or reduce speed slightly
- Test different frequencies
- Check whether the plastic has laser-sensitive additives
- Consider a different laser type or a laser-markable grade
The Plastic Melts or Bubbles
- Reduce power
- Increase speed
- Increase hatch spacing
- Reduce passes
- Let the part cool between marks
- Try a small defocus
The Mark Looks Burnt or Yellow
- Reduce energy
- Check the frequency
- Use fewer passes
- Improve extraction, so smoke does not settle on the part
The Edges Are Rough or Melted
- Lower the power and increase the speed
- Use a smaller spot with a shorter focal length lens
- Check the focus
- Keep the design simple and bold
The Part Warps
- Reduce total energy
- Mark smaller areas
- Allow cooling between marks
- Hold the part flat and supported
Results Differ from Part to Part
- Check that all parts are the same plastic, color, and supplier
- Check for different batches or additives
- Keep the focus exactly the same
- Retest when materials change
The Mark Has Low Contrast for Scanning
- Increase contrast by adjusting settings, and test different frequencies
- Use a laser-markable plastic
- Try a laser-sensitive coating
- Consider another marking method
Common Mistakes to Avoid
- Marking PVC, PTFE, or unknown plastics
- Using metal settings on plastic
- Skipping the test grid
- Marking without strong fume extraction
- Expecting clear plastics to mark with a fiber laser
- Assuming all parts from the same plastic will behave the same
- Using too much power and melting the part
- Not checking the focus
- Not saving working settings
- Not wearing laser safety glasses
Quick Checklist for Marking Plastics with a Fiber Laser
Before marking
- Plastic identified and confirmed safe to laser mark
- Safety information checked
- Part clean, dry, and held firmly
- Strong fume extraction running
- Clean vector design prepared
Testing
- Very gentle starting settings
- Test grid with one or two settings changing
- Results inspected under magnification
- Best result chosen, with the lowest energy
- Settings saved with plastic type, color, and supplier
Marking
- Focus checked
- Part watched during marking
- Part cooled and cleaned gently
- Mark inspected and scanned if it is a code
FAQ
Can a fiber laser mark plastic?
Yes, many plastics can be marked, especially engineering plastics such as ABS, polycarbonate, and nylon, and plastics with laser-sensitive additives. Results vary, so always test.
Which plastics work best with fiber lasers?
ABS, polycarbonate, nylon, PBT, and PC/ABS blends often work well. Plastics with laser-markable additives usually give the best results.
Can a fiber laser mark clear or transparent plastic?
Usually not well. Many clear plastics let the 1064 nm beam pass through. CO2 or UV lasers are often better choices.
Is it safe to mark PVC?
No. PVC releases hydrogen chloride and other harmful gases when heated, which are toxic and corrosive. Never laser mark PVC.
Why does my plastic melt when I mark it?
Too much energy or heat build-up. Reduce power, increase speed, widen the hatch spacing, use fewer passes, and test on scrap.
Do I need MOPA laser for plastics?
Not always, but adjustable pulse width can give better control and less heat damage on many plastics.
Is a CO2 or UV laser better for plastic?
Often yes. CO2 lasers work well on many plastics and organic materials, and UV lasers give very fine, clean marks with little heat. Fiber lasers are best for metals.
Can I mark barcodes and QR codes on plastic?
Yes, on suitable plastics, but contrast is the main challenge. Test with your real scanner before production.
Why are my plastic marks inconsistent?
Different batches, colors, and suppliers can contain different additives, which changes how the plastic reacts. Test each new material.
Do I need fume extraction for plastics?
Yes, always. Plastic smoke can be irritating and harmful, so use strong extraction and good ventilation.
Conclusion
So, can fiber laser machines mark plastics? Yes, within limits.
Fiber lasers can mark many engineering plastics and plastics with laser-sensitive additives, giving permanent, clear marks without ink or labels. But plastics are more sensitive to heat than metals, many of them do not absorb 1064 nm light well, and some should never be laser marked at all. Always identify the plastic, check its safety information, use strong fume extraction, start with gentle settings, and test on scrap before marking the real part. If your work is mostly plastic, consider whether a CO2 or UV laser would suit you better.
If you are choosing equipment for your workshop, explore our fiber laser marking machines, field lenses, rotary axes, and fixture tables at MCast 3D. If you are not sure which machine suits your materials, contact our team and we will help you choose.