
How to Remove Cured Resin From a 3D Printer Vat Safely

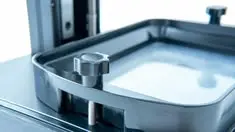
Every resin printer owner has opened the lid after a failed print and found the same thing: a hard, cloudy, plastic-like chunk stuck in the vat. Sometimes it is a whole failed model. Sometimes it is a thin sheet clinging to the bottom. Sometimes it is a scattering of tiny cured bits floating in the liquid, waiting to cause the next failure.
Cleaning this up is not just about tidiness. Done wrong, it can scratch the film, crack the vat, spill resin onto the screen, or leave you with a skin rash. Done right, it takes a few minutes, costs almost nothing, and protects your printer.
In this guide, you will learn how to remove cured resin from a 3D printer vat safely, including the tools to use, the tools to avoid, a simple step-by-step method, how to clean the sides and corners, how to dispose of the waste, and how to stop it happening again. Everything is explained in plain and simple language.
Different printers have different vat designs. Always check your printer’s manual, and use this article as a general guide.
What Is a Resin Vat?
The vat, also called the resin tank, is the container that holds liquid resin on top of the printer’s screen. Most vats have two main parts.
- The frame or body, usually made of plastic or aluminum, which forms the walls of the tank.
- The release film, a thin, clear film stretched across the bottom, which lets UV light pass through and gives cured layers a non-stick surface to peel from. It is often called FEP or NFEP film.
Some vats also have a rubber or silicone seal and small markings on the walls to show fill levels.
The film is the most delicate part. Our guides on NFEP film and how to remove cured resin from an FEP film explain it in detail. This article looks at the whole vat: the film, the walls, the corners, and the liquid resin inside.
Why Does Cured Resin End Up in the Vat?
Knowing the cause helps you prevent the problem. Cured resin usually appears in the vat because of:
- A failed print. The model detaches from the build plate and stays on the film.
- Broken supports. Small pieces snap off and fall into the resin.
- Poor build plate adhesion. First layers do not stick to the plate.
- An unlevel plate or wrong Z zero. See our guide on how to calibrate your resin 3D printer’s Z-axis and level the build plate.
- Wrong exposure settings. Weak layers break away.
- Cold or poorly mixed resin.
- A worn film or aging screen. See our guide on when to replace a resin printer’s LCD screen.
- Resin left to sit in light. Stray UV or sunlight can slowly cure a thin layer on the surface or at the bottom.
If failures are frequent, our guide on why resin 3D prints fail can help you find the real cause.
Types of Cured Resin You Might Find
Different kinds of cured resin need slightly different handling.
- Large chunks: whole failed prints or big pieces
- Thin sheets or skins: a thin cured layer stuck to the film
- Small specks and flakes: tiny bits floating in the liquid or stuck to the walls
- Cured drips and splashes on the rim and sides
- A cured ring or edge around the bottom of the vat, where resin sits against the frame
Each one has a different best approach, which we cover below.
Safety First
Liquid resin is a skin irritant, and cured pieces are often coated with sticky, uncured resin. Before you begin:
- Wear nitrile gloves and eye protection.
- Wear long sleeves or an apron.
- Work in a well-ventilated space.
- Cover your work area with paper or a mat.
- Keep children and pets away.
- Have paper towels, a clean container, and a waste bag ready.
- Switch off and unplug the printer before removing the vat or working near the screen.
If resin touches your skin, wipe it off with a paper towel, then wash with plenty of soap and water. Do not use alcohol on your skin. Our guide on resin 3D printing safety covers ventilation, gloves, storage, and waste disposal in detail.
Tools You Will Need
Safe tools
- A plastic scraper or a flexible plastic spatula
- A silicone spatula or scraper
- An old plastic card, with the corners rounded off
- A resin filter and a clean funnel
- A clean container or the original resin bottle
- Lint-free cloths or soft paper towels
- Isopropyl alcohol (IPA) for cleaning surfaces
- A small soft brush, such as a clean paintbrush, for corners
- Nitrile gloves and eye protection
- Good lighting
Tools to avoid
- Metal scrapers, razor blades, knives, or screwdrivers
- Hard or sharp-edged plastic
- Rough sponges and abrasive pads
- Anything with a burr or chipped edge
- Hot tools or heat guns on or near the film
A single careless stroke with a metal tool can leave a permanent scratch on the film, and scratches can show up in every future print.
Step-by-Step: How to Remove Cured Resin From the Vat
Step 1: Stop and Switch Off
If a print has just failed, stop the printer and switch it off. Do not keep moving the Z-axis up and down, because pieces on the film can be pushed into it and damage it.
Step 2: Remove the Build Plate
Carefully lift the build plate away and place it on a protected surface. If any cured resin is stuck to the plate, deal with it later.
Step 3: Take Out the Vat
Gently remove the vat and hold it level, so liquid resin does not spill onto the screen. Place it on a protected surface.
Step 4: Look Before You Touch
Look at the vat from above and from the side, in good light. Ask yourself:
- Where are the cured pieces?
- Are they loose, or stuck to the film or walls?
- Are they large, thin, or tiny?
- Is the film scratched, dented, or loose?
This quick check tells you which method to use.
Step 5: Filter the Liquid Resin
Pour the liquid resin slowly through a clean resin filter into a clean container or bottle. This catches cured bits and keeps your good resin usable.
- Pour slowly and steadily.
- Tilt the vat gently, and use a soft silicone tool to guide any resin that clings to the walls.
- Leave large cured pieces in the vat for now.
- Do not pour resin back into the original bottle if it is full of cured particles. Use a separate, labeled container if needed.
Step 6: Remove Large Cured Chunks
With the liquid out, you can remove the big pieces.
- Hold a plastic scraper or silicone spatula at a very low angle, almost flat against the film.
- Slide the edge under the side of the chunk where it is thinnest or loosest.
- Apply gentle, steady pressure and lift slowly.
- If it resists, do not force it. Try another edge.
- Once it loosens, peel it away gently.
A low angle and light pressure are the secret. A steep angle and a hard push cause scratches and dents.
Step 7: Remove Thin Sheets and Skins
Thin cured sheets cling to the film like a sticker.
- Use a flexible silicone spatula or a rounded plastic card.
- Start at an edge, and push gently across the surface in one direction.
- Work slowly. Check the film often.
- If the sheet tears, start again from a new edge.
Step 8: Clean the Walls, Corners, and Rim
Cured resin often sticks where the film meets the frame.
- Use a soft brush or the edge of a silicone spatula to loosen flakes in the corners.
- Wipe the walls with a lint-free cloth lightly dampened with IPA.
- For cured drips on the rim, use a plastic scraper gently, holding it flat against the surface.
- Do not dig at the seal or gasket, if your vat has one.
Be patient in corners. This is where most of the damage happens, because it is easy to press too hard.
Step 9: Remove Small Specks and Flakes
Small bits can be the most annoying, because they are easy to miss and cause the next failure.
- Use a silicone spatula or clean, soft cloth lightly dampened with IPA to gently pick up flakes.
- Look closely at the film and walls under bright light, from different angles.
- Filter the resin again if needed.
Step 10: Clean the Vat
Once the cured resin is out:
- Wipe the inside of the vat with a clean, lint-free cloth and a little IPA.
- Wipe the outside and rim to remove drips.
- Do not pour large amounts of IPA into the vat, and do not soak the vat for long. Some plastics can cloud or weaken, and some films can be affected. Check your manual.
- Let the vat dry completely before use.
Keep IPA away from heat and flames, and use it in a well-ventilated space.
Step 11: Inspect the Film and Vat
Hold the vat up to a light, or look through the film against a bright surface. Check for:
- Deep scratches you can feel with a fingernail
- Cloudy or white areas
- Dents or dimples
- Holes or tears
- Loose or wrinkled film
- Cracks in the vat frame
- Damaged seals
If you see any of these, the film or vat may need replacing. See the next section.
Step 12: Check the Screen
Before reinstalling the vat, look at the screen for resin spills or marks. If there is resin, switch off and unplug the printer, then clean it carefully with a soft, lint-free cloth. If marks do not wipe away, the screen may be damaged. Our guide on when to replace a resin printer’s LCD screen explains the signs.
Step 12: Reinstall and Test
Place the clean, dry vat back in the printer. Add filtered resin, mixing gently. Check that the build plate is leveled and Z zero is correct before starting a new print.
When to Replace the Film or Vat Instead
Some damage cannot be repaired. Replace the film if it has:
- Deep scratches you can feel
- Large cloudy or white areas
- Holes, cuts, or tears
- Permanent dents
- Loose, wrinkled, or overstretched tension
- Repeated failures that settings do not explain
Replace the vat itself if it has:
- Cracks in the frame
- Warping that stops the film from sitting flat
- Damaged seals that leak
- Heavily cured resin that cannot be removed without damage
A new film or vat costs far less than a failed batch of prints, a wasted bottle of resin, or a damaged screen. If you are not sure, replacing is usually the safer choice.
What If Resin Leaked Through to the Screen?
If the film tears or the vat leaks, resin can reach the screen. Act quickly.
- Switch off and unplug the printer immediately.
- Remove the vat carefully, holding it level.
- Wipe up liquid resin from the screen with a soft, lint-free cloth, without pressing hard.
- Clean the screen gently with a cloth lightly dampened with IPA.
- Let it dry completely.
- Check the screen carefully for stains or marks.
If stains do not wipe away, the resin may have seeped into the screen layers, which can cause permanent damage. Our guide on when to replace a resin printer’s LCD screen explains what to do next.
What to Do With the Removed Cured Resin
Cured resin pieces are generally treated as solid waste, but there are a few safety points.
- Make sure the pieces are fully cured. If they feel sticky or wet, place them in sunlight or under a UV curing station until they are hard.
- Wipe off any liquid resin before throwing them away.
- Treat gloves, paper towels, filters, and funnels the same way. Cure any liquid resin on them first.
- Never throw liquid resin in the trash, down the drain, or onto the ground.
- Follow your local waste rules.
How to Clean a Vat When Switching Resins
When you change to a different resin, clean the vat carefully. Leftover resin can mix with the new resin and cause problems. Our guide on whether you can mix different brands of 3D printer resin explains why.
- Filter and return the old resin to its own bottle.
- Wipe the vat with clean paper towels to remove most of the resin.
- Wipe again with IPA on a lint-free cloth.
- Remove any cured bits using the steps above.
- Dry completely.
- Inspect the film.
- Add the new resin and run a quick test print.
If you often switch between resins, consider keeping a separate vat for each type, which saves time and avoids cross-contamination. If you use both standard and water-washable resins, our guide on the difference between water-washable resin and standard resin explains how their cleaning differs.
A Simple Vat Cleaning Routine
W
Regular care prevents big problems.
After every print
- Check the vat for cured bits or flakes
- Wipe up drips on the rim and sides
- Cover the vat if you will not print again soon, to keep dust and light out
Weekly, or after a heavy printing week
- Filter the resin
- Wipe the vat walls and rim
- Inspect the film for scratches and cloudy areas
- Check the screen for spills
Monthly, or when problems appear
- Deep clean the vat
- Check the film tension and condition
- Check the build plate and Z zero
- Inspect the vat frame for cracks and seals
How to Prevent Cured Resin in the Vat
The best cleaning method is not needing one. A few habits reduce failures a lot.
- Level the build plate carefully and recheck it regularly.
- Clean the build plate before each print.
- Use proper supports with strong bases and good attachment points.
- Test your exposure settings with a calibration print, especially with new resin.
- Mix resin well and keep it at a steady temperature.
- Filter the resin after prints and after failures.
- Check the film regularly.
- Do not overfill the vat.
- Stop failed prints early, as soon as you notice a problem.
- Keep light out. Cover the vat when not printing.
- Use plastic tools only around the film and screen.
- Do not leave resin in the vat for weeks. Filter it back into a bottle if you will not print for a long time.
If your prints are also affected by color or clarity issues, our guides on why resin changes color after UV exposure and whether resin 3D printing can produce transparent parts explain how cleanliness and storage matter.
Troubleshooting Common Problems
A Cured Piece Will Not Come Off
- Do not force it
- Try a different edge, and keep a low angle
- Use a more flexible tool, such as silicone
- Take a break and try again with fresh eyes
- If it is stuck very firmly, consider replacing the film rather than risking damage
I Scratched the Film
- Check how deep the scratch is. If you can feel it with a fingernail, replace the film
- Light surface marks may be acceptable, but watch print quality
- Use only plastic and silicone tools in future
The Vat Looks Cloudy After Cleaning
- Check whether you soaked it too long in IPA
- Wipe gently with a clean, dry, lint-free cloth
- Check your manual for recommended cleaning liquids
- If the cloudiness is in the film, replace it
Small Flakes Keep Appearing in the Resin
- Filter the resin again, using a fresh filter
- Check the film and walls for loose cured bits
- Look for the cause of failures that create bits
The Film Is Loose or Wrinkled After Cleaning
- You may have pushed too hard or stretched it
- Check your manual for tension adjustment or replacement
- Replace the film if it cannot be fixed
The Vat Has Cured Resin on the Outside
- Wipe it off with a cloth and IPA while wearing gloves
- Check for leaks around the film and seals
- Make sure the outside is clean and dry before you put the vat back
Common Mistakes to Avoid
- Using a metal scraper, blade, or screwdriver
- Pushing at a steep angle or with too much force
- Soaking the vat or film in IPA for too long
- Pouring unfiltered resin back into the bottle
- Running the printer with cured bits still in the vat
- Peeling the film off the frame just to clean it
- Ignoring a scratched, cloudy, or loose film
- Skipping gloves and eye protection
- Throwing liquid resin or contaminated towels straight into the trash
- Forgetting to check the screen after a spill
- Not cleaning the vat when switching resins
Quick Checklist
Before you start
- Printer off and unplugged
- Gloves, eye protection, and long sleeves on
- Work area covered
- Plastic and silicone tools ready
- Filter and clean container ready
While cleaning
- Vat removed carefully and held level
- Resin filtered
- Large chunks lifted with a low-angle tool
- Thin sheets peeled gently from an edge
- Corners cleaned with a soft brush or silicone
- Walls and rim wiped with a lint-free cloth and IPA
After cleaning
- Vat dried fully
- Film and frame inspected
- Screen checked for spills
- Cured waste cured further and disposed of safely
- Build plate leveled before the next print
FAQ
How do I remove cured resin from a resin vat?
Switch off the printer, remove the vat, filter the liquid resin, then lift cured pieces with a plastic or silicone tool held at a low angle. Clean the film, walls, and corners gently, wipe with IPA, and let everything dry.
Can I use a metal scraper on the vat?
No. Metal tools scratch and puncture the film very easily. Use plastic or silicone tools only.
Can I soak the vat in IPA to loosen cured resin?
It is better not to. Long soaking can cloud plastic parts or affect the film. Wipe gently with a lightly dampened cloth, and check your manual.
What should I do with cured resin chunks?
Make sure they are fully cured, wipe off any liquid resin, and dispose of them as solid waste according to your local rules.
How do I clean the corners of the vat?
Use a soft brush or the edge of a silicone spatula to loosen flakes, then wipe with a lint-free cloth lightly dampened with IPA. Be gentle and do not dig at the seal.
Should I filter the resin after a failed print?
Yes. Filtering removes cured bits that would cause more failures. Use a clean filter and funnel.
How do I know if my film or vat needs replacing?
Look for deep scratches, cloudy areas, dents, holes, loose tension, cracks, or leaks. If in doubt, replace it.
What if resin got on my printer screen?
Switch off and unplug the printer, wipe up the resin gently with a soft, lint-free cloth, and clean with a lightly dampened cloth. If stains remain, the screen may be damaged.
How often should I clean the vat?
Check it after every print, filter weekly during heavy use, and do a deeper clean monthly or whenever problems appear.
Do I need a separate vat for each resin?
It is not required, but it saves time and prevents cross-contamination, especially if you switch resins often.
Conclusion
Removing cured resin from a 3D printer vat does not have to be stressful, as long as you slow down and use the right tools.
Switch off the printer, wear gloves and eye protection, remove the vat carefully, and filter the liquid resin. Lift cured pieces gently with plastic or silicone tools at a low angle, clean the corners and walls with a soft brush and a lightly dampened cloth, and let everything dry. Inspect the film, vat, and screen, replace anything that is damaged, and dispose of cured waste safely. A simple cleaning routine and a few good habits will keep your vat clean, your film healthy, and your prints on track.
If you need release films, spare vats, resins, or a new printer, explore our range of resin 3D printers and accessories at MCast 3D. If you are not sure which parts you need, contact our team and we will help you choose.