
Laser Marking Gold-Plated Objects

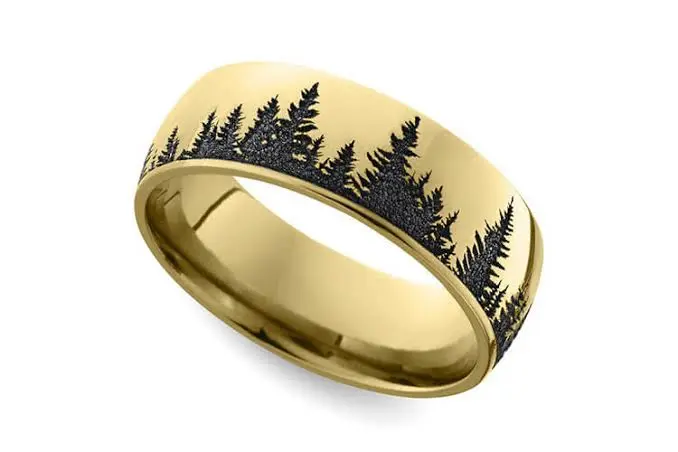
Gold-plated jewelry, watches, pens, lighters, trophies, and accessories look rich and elegant. They also make laser marking a bit trickier than most people expect.
The reason is simple. A gold-plated object is not solid gold. It is a base metal, such as brass, copper, silver, or steel, covered with an extremely thin layer of gold. A fiber laser can easily go straight through that layer, leaving a mark you did not plan for.
The good news is that you can mark gold-plated objects cleanly and consistently once you understand how plating behaves under a laser. In this guide, you will learn how to laser mark gold-plated objects, the two main ways to do it, how to choose settings, how to avoid common problems, and what to check before you start.
What Is Gold Plating?
Gold plating is a thin coating of gold applied to the surface of another metal, usually by electroplating. The base metal gives the object its strength and shape. The gold layer gives it the color and shine.
Common base metals include:
- Brass
- Copper
- Sterling silver (often called vermeil when it carries a thicker gold layer)
- Stainless steel
- Nickel-based alloys
Many plated pieces also have a thin barrier layer, such as nickel or copper, between the base metal and the gold. This layer helps the gold stick and protects it from wearing through too quickly.
How Thick Is the Plating?
Plating thickness is measured in microns, which are thousandths of a millimeter. It can vary a lot:
- Flash plating is extremely thin, and it wears away quickly.
- Standard plating is a bit thicker and suits everyday jewelry.
- Thick plating, such as on vermeil or higher-quality pieces, is more durable and more forgiving.
Thickness matters a great deal for laser marking. A thin layer can be removed by a single light pass. A thicker layer gives you more room to work with.
Gold-Plated vs Solid Gold
This is an important difference for marking.
- Solid gold is gold all the way through. A mark cuts into gold.
- Gold-plated items have only a surface layer. A mark can cut through that layer and show the metal below.
Because of this, the same settings that work on solid gold can ruin a plated piece. If you are unsure what you are marking, always test first.
Why Gold-Plated Objects Are Tricky to Mark
A few things make plated items different from regular metal parts.
- The gold layer is very thin. It is easy to remove by accident.
- Gold is very reflective. It bounces a lot of the laser’s energy away, so settings need care.
- Heat spreads quickly. Heat can discolor the plating or damage the bond with the base metal.
- The base metal shows through. If the laser goes through the plating, you see the color of the metal underneath.
- Exposed base metal can tarnish. Once the plating is broken, the metal below may react with air and moisture over time.
- Pieces are often small and curved. That adds focus and holding challenges.
The key is to decide what kind of mark you want before you touch the laser settings.
Two Ways to Laser Mark Gold-Plated Objects
There are two main approaches. Each gives a different result.
Method 1: Marking Through the Plating (Ablation)
In this method, the laser removes the gold layer in the shape of your design and reveals the metal underneath.
How it looks: The design appears in the color of the base metal, such as silver-white, copper-red, or a darker tone, against the golden background.
Advantages:
- Strong, clear contrast when the base metal differs in color from the gold
- Good for logos, text, serial numbers, and codes
- Often needs less power than engraving a solid metal
Drawbacks:
- The base metal is exposed, so it may tarnish or corrode over time
- If the barrier layer is nickel, it may be exposed, which can matter for items that touch skin
- Contrast is weaker if the base metal is close in color to gold, as with brass
- It is permanent and cannot be corrected without replating
Method 2: Marking the Surface of the Plating
In this method, the laser changes the surface of the gold layer without removing it. This can darken or alter the look of the plating in a very light way.
How it looks: A subtle mark, usually slightly darker or duller than the surrounding gold.
Advantages:
- The base metal stays covered
- Less risk of tarnish or exposed metal
- Gives a more refined, delicate look
Drawbacks:
- Low contrast, so it may be hard to read
- Very sensitive to settings and plating thickness
- Easy to accidentally break through thin plating
- Not suitable for very thin or flash plating
Many workshops use Method 1 when readability matters most, and Method 2 when the appearance and protection of the gold layer matter more. Test both on a sample of the same piece to see which suits your product.
If you want to understand the difference between removing material and changing the surface, our guide on the difference between engraving, etching, and printing explains it in simple terms.
Step 1: Find Out What You Are Marking
Before you do anything, learn as much as you can about the object.
- What is the base metal? Brass, copper, silver, and steel all behave differently.
- How thick is the plating? Ask the maker or supplier. Thick plating is far more forgiving.
- Is there a barrier layer? Nickel or copper layers may be present.
- Is there a protective coating? Some pieces have a clear lacquer on top.
- Is it solid gold, gold-filled, or plated? Do not assume.
- Does it include stones, enamel, or glue? These need extra care.
If you cannot find the details, treat the piece as thinly plated and start with very gentle settings.
Step 2: Think About the Order of Work
Where marking fits in your process affects the result.
- Marking before plating: The plating covers the mark and softens it. This is common for hallmarks and maker’s marks, and gives a protected result.
- Marking after plating: This is more common, but the mark may break through the gold layer and show the base metal.
- Marking before final polishing or coating: Some workshops mark first and add a clear protective coating afterwards.
There is no single correct answer for every product. Test your own process on sample pieces and choose what looks best and lasts best.
Step 3: Clean the Piece Thoroughly
Oil, dust, and fingerprints can cause uneven marks, especially on shiny plating.
- Wash with warm water and a mild soap.
- Wipe with isopropyl alcohol on a soft, lint-free cloth.
- Dry completely.
- Handle with clean gloves or tweezers from this point on.
Be gentle. Plating can scratch easily, and rubbing too hard can wear thin gold layers. Avoid harsh chemicals or abrasive cloths.
Our guide on how to prepare jewelry for fiber laser marking covers cleaning and preparation in more detail.
Step 4: Choose a Safe Marking Area
Choose the spot carefully.
- Pick a flat or gently curved area.
- Keep marks away from stones, enamel, solder joints, and thin edges.
- Avoid areas that rub against skin or other surfaces, if possible, since friction can wear the mark and the plating.
- Leave a margin around the mark so heat does not reach delicate parts.
- Use the back or inside of the piece for maker’s marks and serial numbers.
Keeping the mark small and tidy also reduces the heat put into the piece.
Step 5: Hold the Piece Securely
Good fixturing is important for any small piece, and especially valuable plated items.
- Use a stable fixture so the piece cannot shift.
- Use soft holders to avoid scratching the plating.
- Keep the marking area level and facing the lens.
A fixture table for fiber laser marking machines keeps pieces steady and in the same position every time, which saves time on repeat jobs. For rings, bangles, and round objects, a rotary axis helps keep the surface at the right distance from the lens.
Step 6: Set the Focus Precisely
Plating is thin, so small focus errors make a big difference.
- Set the surface at the lens’s focal distance.
- Use the red guide light to check position, if your machine has one.
- Keep the piece level.
- Re-check the focus whenever the piece height changes.
A short focal length lens, such as an F-163 or F-210, gives a smaller, sharper laser spot, which is ideal for small marks on jewelry. Our guide on how to choose the right fiber laser marking lens explains how lens choice affects detail, and you can browse our fiber laser marking machine field lenses here.
Step 7: Choose a Gentle Laser Settings
Exact settings depend on your machine, lens, and the piece, so testing is essential. But these principles apply to almost every gold-plated object.
- Start with low power. You can always add more. You cannot put the gold back.
- Use moderate to fast speed. This limits how much heat builds up in one spot.
- Test frequency carefully. Frequency changes how the mark looks and how much material is removed.
- Use tight, even hatch spacing for clean fills, and avoid overlapping lines that overheat the surface.
- Use as few passes as possible. Extra passes can break through thin plating.
- Allow cooling between marks on small pieces.
For marking through the plating, increase energy slowly until the gold just clears. For surface marking, stay well below that level and look for a subtle change.
Our guide on how to choose the right marking speed and power for fiber lasers explains how power, speed, and frequency work together and shows how to build a simple test grid.
Step 8: Always Test on a Sample First
Never mark the real piece without testing.
- Use a sample with the same base metal, plating, and finish. If possible, use a spare piece from the same batch.
- Mark a test grid with small changes in power and speed.
- Inspect the results under a loupe or magnifier.
- Check for burn-through, discoloration, blistering, or halos around the mark.
- Choose the lowest energy that gives a clear, clean result.
- Save your settings, with notes on the base metal and plating thickness.
Plating thickness can vary between batches and suppliers, so test again whenever your source changes.
Step 9: Mark, Inspect, and Clean
When you are ready:
- Double-check the fixture, focus, and design alignment.
- Make sure fume extraction is running.
- Start the mark and watch for anything unusual.
- After marking, inspect with a loupe.
- Clean away dust and residue gently with a soft cloth.
Look closely at the edges of the mark. If you see lifting, flaking, or discoloration, reduce energy for the next piece.
Step 10: Protect the Exposed Metal
If your mark goes through the plating, the base metal is now exposed. Over time, it can tarnish, corrode, or stain the surrounding gold.
- Consider applying a clear protective coating or lacquer over the marked area, if it suits your product.
- Keep marks small and in low-contact areas.
- Think about how the product will be used. Items worn on the skin or exposed to moisture are more at risk.
- Check whether your product needs to meet rules about nickel or other metals that touch the skin. Requirements vary by country and product type.
Test how marked samples age before you commit to production, especially for jewelry.
Design Tips for Marks on Gold-Plated Items
Good design makes marking easier.
- Use simple, clean fonts and avoid very thin lines.
- Keep text large enough to read comfortably. Our guide on how to mark tiny text without losing readability explains how to get small text right.
- Choose short words and numbers.
- Avoid big filled areas, which add more heat.
- For QR codes, keep the data short and make sure the contrast is strong. See our guide on how to improve QR code readability on small metal components.
A Note on Hallmarks and Labels
Be careful about what you mark on a plated object.
- Do not mark karat or purity stamps on a plated item unless it genuinely meets the legal requirements. A karat mark on a plated piece can mislead buyers, and many countries have rules about this.
- Plated items are usually marked with terms such as “gold plated” or abbreviations commonly used for that purpose.
- Follow the jewelry and labeling rules in your country and in the countries where you sell.
When in doubt, check with your local standards authority or trade association before marking.
Laser Safety
Fiber lasers can seriously injure your eyes, and shiny gold surfaces reflect the beam in unpredictable ways.
- Wear laser safety glasses rated for 1064 nm.
- Do not look at the beam or its reflections.
- Use fume extraction. Plated metals and coatings can release fumes when heated.
- Keep reflective tools and objects out of the beam path.
- Keep the machine away from children and untrained people.
- Follow your machine manufacturer’s safety instructions.
Troubleshooting Common Problems
The Laser Burned Through the Plating When I Did Not Want It To
- Reduce power
- Increase speed
- Use fewer passes
- Check that the focus is not too sharp or too close
- Test on a piece with thicker plating
The Mark Is Too Faint
- Check the focus first
- Increase power slightly
- Reduce speed slightly
- Make sure the surface is clean
- Consider marking through the plating if the surface mark is too subtle
The Gold Looks Discolored or Burnt Around the Mark
- Reduce energy
- Increase hatch spacing slightly
- Allow cooling between marks
- Keep the mark smaller
The Plating Is Lifting or Flaking
- Reduce power and passes
- Check the quality and thickness of the plating
- Check that the piece was clean before marking
The Contrast Is Low After Marking Through the Plating
- Check what the base metal is. Brass under gold shows little contrast.
- Try a different method, such as a light surface mark
- Consider changing the order of work, such as marking before plating
The Mark Tarnishes Over Time
- Apply a protective clear coating
- Reduce the size of the exposed area
- Consider a different base metal or a thicker plating
Common Mistakes to Avoid
- Treating plated pieces like solid gold
- Skipping the test mark on a matching sample
- Using too much power or too many passes
- Ignoring plating thickness
- Forgetting that the base metal shows through
- Marking close to stones, enamel, or thin edges
- Marking karat or purity stamps on plated items
- Not protecting exposed metal on items worn against the skin
- Not wearing proper laser safety glasses
Quick Checklist for Laser Marking Gold-Plated Objects
Before marking
- Base metal and plating thickness identified
- Marking method chosen: through the plating or surface only
- Piece cleaned and fully dry
- Safe marking area chosen
- Piece held securely and level
At the machine
- Focus set exactly
- Short focal length lens for small marks
- Low power, moderate to fast speed, few passes
- Test grid done on a matching sample
- Settings saved
After marking
- Mark inspected under magnification
- Piece cleaned gently
- Exposed metal protected, if needed
- Labeling rules checked
FAQ
Can you laser mark gold-plated jewelry?
Yes. A fiber laser can mark gold-plated jewelry, but the plating is thin, so you need gentle settings and a test on a matching sample first.
Will laser marking remove the gold plating?
It can. If you use enough energy, the laser removes the gold layer and shows the metal below. With very light settings, you can mark the surface without breaking through, though this is harder on thin plating.
What color will the mark be on gold-plated items
If you mark through the plating, the mark takes the color of the base metal, such as silver-white, reddish copper, or darker tones. A surface-only mark is usually a subtle darker or duller shade of gold.
Is it better to mark before or after plating?
It depends on your product. Marking before plating gives a protected, softer mark. Marking after plating gives a sharper mark but may expose the base metal. Test both.
Does the base metal matter?
Yes. It affects contrast, heat behavior, and tarnish risk. Brass under gold gives low contrast, while silver or steel often shows a clearer mark.
What laser lens is best for gold-plated jewelry
Shorter focal length lenses, such as F-163 or F-210, are popular because they give a small, sharp spot for fine detail.
Can marking cause the plating to tarnish?
If the plating is broken, the exposed base metal can tarnish over time. A clear protective coating and careful design can reduce the risk.
Can I mark karat stamps on gold-plated items?
Be very careful. Karat marks can mislead buyers and may break local rules on plated goods. Check the laws and standards in your country before marking.
Do I need special safety equipment?
Yes. Wear laser safety glasses rated for 1064 nm and use fume extraction. Shiny gold can reflect the beam, so safety matters even more.
Conclusion
Laser marking gold-plated objects is very doable, but it rewards care and patience.
Start by finding out what you are marking, including the base metal and plating thickness. Decide whether you want to mark through the plating for strong contrast or mark the surface gently for a refined look. Clean the piece, hold it securely, set the focus precisely, and use low power, moderate to fast speed, and as few passes as possible. Always test on a matching sample, protect any exposed metal, and follow the labeling rules for plated goods.
If you are setting up or upgrading your marking workshop, explore our fiber laser marking machines, lenses, rotary axes, and fixture tables at MCast 3D. If you are not sure which setup suits your plated jewelry and accessories, contact our team and we will help you choose.