
How to Calibrate Resin 3D Printer Z-Axis and Build Plate Leveling

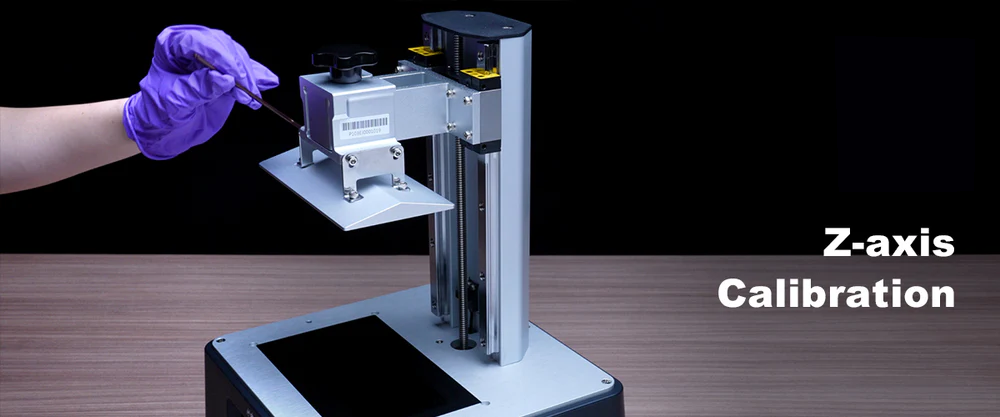
If you ask experienced resin printer owners what the most common cause of failed prints is, a surprising number will give the same answer: the first layer.
A resin print is built on top of its first few layers. If those layers do not stick to the build plate, the whole print can fall off, stay in the vat, and ruin the film. If the build plate is slightly tilted, one side sticks too hard and the other side does not stick at all. If the Z-axis zero point is wrong, the plate is either too far from the film or crushing against it.
The good news is that calibrating the Z-axis and leveling the build plate is a simple job. It takes about ten minutes, needs almost no special tools, and can fix a large share of print failures.
In this guide, you will learn how to calibrate your resin 3D printer’s Z-axis and level the build plate, step by step. You will also learn how to check your work, what the signs of bad leveling look like, and how to keep your printer in good shape, all in plain and simple language.
Different printers have slightly different steps. Always check your printer’s manual first, and use this article as a general guide.
What Does “Z-Axis Calibration” Mean?
A resin printer’s build plate moves up and down. That vertical movement is called the Z-axis.
The printer needs to know exactly where the bottom of the plate is in relation to the release film at the bottom of the vat. This reference point is called Z zero or the home position.
- If Z zero is set too high, there is a gap between the plate and the film. The first layer does not stick to the plate, and prints fail.
- If Z zero is set too low, the plate presses too hard against the film. This can squash the first layers, cause bulging at the bottom, and damage the film or the screen.
- If Z zero is just right, the first layer is thin and even, and the plate and the film are almost touching, with only a tiny gap for resin.
So Z-axis calibration is mostly about setting the correct zero point.
What Does “Build Plate Leveling” Mean?
Leveling means making sure the bottom face of the build plate is perfectly parallel to the film and the screen. When it is, the first layer has the same thickness across the whole plate.
If the plate is tilted, even a little:
- One side is closer to the film. That side may be squashed.
- The other side is farther away. That side may not stick.
- The result is uneven first layers and unreliable adhesion.
In most resin printers, the build plate is mounted on an arm with a small ball joint or pivot, and it is held by screws. Loosening these screws lets the plate settle flat against a reference surface, and tightening them locks it in place.
Why Calibration and Leveling Matter
Good calibration gives you:
- Better first-layer adhesion. Prints stick to the plate, not the film.
- Fewer failed prints. Many failures start at the first layer.
- More accurate dimensions, especially at the bottom of a model.
- Cleaner bottoms, without bulging or “elephant foot.”
- Longer film and screen life, because the plate is not crushing them.
- More consistent results from print to print.
If prints keep failing, our guide on why resin 3D prints fail can help you find the cause. But leveling is always one of the first things to check.
Signs That Your Plate Needs Leveling or Z Calibration
Check for these warning signs.
- Prints do not stick to the plate, or fall off during printing
- Prints stick to the film, leaving cured resin on the bottom of the vat
- One side of the print sticks, the other side does not
- The first layers look squashed, wide, or bulging at the base
- Parts of the raft or the first layers are missing
- Failed prints are common, even with good settings
- You hear a loud crunch or feel resistance when the plate lowers
- The plate does not sit flat when lowered
- You changed the film or vat and have not re-leveled
- You moved or bumped the printer
If you see any of these, it is time to calibrate.
What You Will Need
You do not need special tools. Gather:
- The Allen keys (hex keys) that came with your printer
- A sheet of standard printer paper (about 80 gsm is typical). Some printers recommend a specific thickness, so check the manual.
- Clean, lint-free cloths or paper towels
- Isopropyl alcohol (IPA) for cleaning
- Nitrile gloves and eye protection
- Good lighting
Also make sure the following are in good condition before you begin.
- The build plate is clean and free of cured resin.
- The release film is clean, tight, and not damaged. See our guides on NFEP film and how to remove cured resin from an FEP film.
- The LCD screen is clean and not damaged. If you suspect screen wear, see our guide on when to replace a resin printer’s LCD screen.
Safety First
Resin is a skin irritant, and the screen and film are delicate.
- Wear nitrile gloves and eye protection.
- Switch off the printer and unplug it before cleaning the screen or working near it.
- Do not press hard on the screen.
- Keep resin off the screen. If any gets on it, clean it carefully with a soft, lint-free cloth.
- Work in a well-ventilated space.
Our guide on resin 3D printing safety covers ventilation, gloves, storage, and waste disposal.
Step-by-Step: The Paper Method for Leveling and Z Zero
This is the most common method, used on many LCD resin printers. The idea is to use a sheet of paper as a spacer, so the plate sits just slightly above the screen, which creates the right gap for the first layer.
Note: Always follow your printer’s manual. Some printers have different procedures, such as a pre-set Z zero or an auto-level function.
Step 1: Prepare the Printer
- Switch off the printer and unplug it, or put it in a safe state for adjustment.
- Remove the vat from the printer and set it aside, covered if it contains resin.
- Remove the build plate and clean it with a lint-free cloth and a little IPA. Check that the bottom face is flat, clean, and free of cured bits.
- Wipe the LCD screen gently with a soft, lint-free cloth if needed. Never use abrasive cloths, and do not press hard.
Step 2: Loosen the Build Plate Screws
- Reinstall the build plate on its arm.
- Using the Allen key, loosen the screws that hold the plate, as described in your manual. Loosen them just enough for the plate to move freely, but not so much that it falls off.
When these screws are loose, the plate can tilt slightly and settle flat against whatever is below it.
Step 3: Place the paper on the screen
Place a flat sheet of standard printer paper on the LCD screen, in the center. Make sure it lies flat, with no folds, wrinkles, or debris underneath.
Some printers use a protective film or a different procedure, so check your manual before placing anything on the screen.
Step 4: Set Z Zero
Now use your printer’s menu to set the Z zero point.
- Go to the printer’s Tools or Manual menu.
- Select the option for “Z-axis home,” “Z calibration,” “Move Z to zero,” or similar. The exact name varies.
- Let the plate lower slowly until it touches the paper.
- The plate may press down gently and settle flat on the paper, since the screws are loose.
Step 5: Tighten the Screws
While the plate is pressed flat on the paper:
- Hold the plate down gently with one hand, if needed.
- Tighten the screws in small steps, alternating between them, so the plate does not shift or tilt.
- Tighten them firmly, but do not overtighten, which can warp the plate or damage the thread.
If your plate has several screws, tighten them gradually in a pattern, like tightening wheel bolts, so the pressure is even.
Step 6: Set the Z Zero Position
Many printers ask you to confirm that this is the new zero position. Look for an option like “Set Z zero” or “Confirm.” Select it, and the printer will remember this position.
Step 7: Check the Paper
Raise the plate a little. Check that:
- The paper slides out with slight friction, not too tight and not loose.
- The paper feels the same all around when you slide it under different parts of the plate, if the printer allows you to do so.
- The plate looks level and sits evenly.
If the paper is stuck or tears, the plate may be too low or the screws may be uneven. If the paper falls out freely, the plate may be too high. Repeat the steps.
Step 8: Remove the paper and Reinstall the Vat
- Remove the paper.
- Wipe the screen gently if needed.
- Reinstall the vat carefully.
- Check that the film is clean and there are no cured bits inside.
- If you are ready to print, add resin and mix gently.
Step-by-Step: Testing Your Calibration
A test print shows whether your calibration is good. Never skip it.
Step 1: Print a First-Layer Test
Use a simple model that covers a large area of the plate, such as a flat plate or a grid with a few layers. This lets you see how the first layers stick across the whole plate. Many printers include a test file, or you can find simple models online.
Step 2: Look at the Results
When the print finishes, check the bottom of the model and the plate.
- Even coverage across the whole plate means good leveling.
- Missing areas on one side mean the plate may be tilted, or that side is too far from the film.
- Squashed edges or bulging mean the plate may be too low or too close to the film.
- Thin, uneven layers can mean uneven leveling.
- Layers that stick to the film, not the plate, mean adhesion problems.
Step 3: Adjust If Needed
If the test shows a problem:
- Repeat the leveling process, paying special attention to how the plate settles.
- Check that the plate is clean and the film is in good shape.
- Check the bottom exposure settings.
- Adjust the Z offset slightly, if your printer allows it, and test again.
Change only one thing at a time.
Fine-Tunning Z Offset
Some printers let you adjust the Z offset, a small change to the zero position without repeating the whole leveling process.
- A small upward offset increases the gap slightly, which can help if the bottom is squashed or bulging.
- A small downward offset reduces the gap, which can help if prints are not sticking.
- Adjust in tiny steps, such as 0.05 mm or less, and test each change.
If your printer uses a different method or has a pre-set Z zero, follow the manufacturer’s instructions.
Bottom Layer and Exposure Settings
Good leveling also depends on correct bottom layer settings. These affect how strongly the first layers stick.
- Bottom layer count: A few layers, often between 3 and 8, are exposed longer than normal to help adhesion.
- Bottom exposure time: Longer exposure makes the first layers stick well, but too long can cause bulging and make prints hard to remove.
- Normal exposure: The main exposure for the rest of the print.
Start with your resin manufacturer’s recommended settings and run an exposure test. Adjust slowly. Our guide on how to print long, thin parts without bending in resin 3D printing also explains how supports and rafts help strong adhesion.
Checking and Maintaining the Z-Axis
Leveling is about the plate. The Z-axis itself also needs to be in good condition.
What Is the Z-Axis Made Of?
Most resin printers use:
- A lead screw (a long threaded rod) that turns to move the plate
- A linear rail or guide that keeps the movement straight
- A motor that turns the screw
- A coupler that connects the motor to the screw
- A nut that rides on the screw
Signs of Z-Axis Problems
- Horizontal lines or ribbing on the print, spaced evenly
- Wobble, where the plate moves slightly from side to side
- Uneven layers or inconsistent heights
- Grinding, squeaking, or rough noises
- Jerky movement or the plate stopping and starting
- Plate that drifts or does not return to the same position
- Print shifting between layers
How to Check the Z-Axis
Switch off and unplug the printer first.
- Look at the lead screw. It should be clean, straight, and lightly lubricated, with no dirt or cured resin.
- Check the rail. It should move smoothly, without sticking.
- Check the coupler and fasteners. Make sure screws are tight and nothing is loose.
- Check the build plate arm. There should be no play or looseness.
- Move the Z-axis through the menu and listen for unusual noises.
- Watch for wobble when the plate moves up and down.
How to Maintain the Z-Axis
- Clean the lead screw with a soft cloth to remove dust and resin.
- Lubricate lightly, using the type of lubricant your manufacturer recommends. Use a very small amount and avoid dripping on the screen or vat.
- Tighten loose screws gently.
- Check for cured resin around the plate arm and screw, and remove it carefully.
- Do not force the plate if it feels stuck. Find out why first.
- Contact support if you find damage or persistent problems.
Regular maintenance helps prevent the small errors that cause bad layers and failed prints.
How Often Should You Level the Plate?
There is no fixed schedule, but these habits help.
- After setting up a new printer
- After replacing the film or vat
- After replacing the screen
- After moving or bumping the printer
- After a crash or a failed print that pressed against the film
- If prints suddenly start failing without a clear reason
- If you notice bottom layer problems
Many users also check the plate and Z zero every few weeks, as part of regular maintenance.
Special Cases
Printer with Auto-Leveling or Pre-Set Z Zero
Some newer printers have built-in sensors or pre-set methods. If yours does, follow the manufacturer’s instructions. You may only need to run an automatic routine, rather than the paper method.
Printers with Different Plate Designs
Some plates use different mounting methods. Always check your manual for the correct number of screws, their location, and the order of tightening.
Printing with Raft or Supports
A good raft and strong supports help the first layers stick, but they cannot fix a poorly leveled plate. Calibrate first, then design your supports. Our guide on how to reduce support marks on resin 3D printed jewelry explains good support practice.
Dental and Precision Work
For accurate work such as dental models, leveling and Z calibration matter even more, because small errors affect fit. Our guides on dental model accuracy and what causes poor fit in 3D printed dental models explain how the printer’s condition affects results.
Choosing a Printer
If you are buying a new resin printer, look at how easy it is to level, how stable the Z-axis is, and the quality of the build plate. Our guide on how to compare resin 3D printers by build volume and XY resolution helps you compare other key features.
Troubleshooting Common Problems
Prints Fall Off the Plate
- Re-level the plate and reset Z zero
- Clean the plate with IPA
- Check that the plate is not scratched or damaged
- Increase bottom exposure slightly
- Check the film and resin condition
- Make sure the resin is warm and well mixed
Prints Stick to the Film
- Check that Z zero is not set too high
- Re-level the plate
- Check the bottom exposure settings
- Replace the film if it is worn, scratched, or loose
- Make sure the vat is clean and the screen is not damaged
One Side Sticks, the Other Does Not
- The plate is tilted. Re-level carefully
- Tighten the screws evenly
- Check that the plate is not bent or damaged
- Check that the screen is clean
The Bottom of the Print Is Squashed or Bulging
- Z zero may be too low
- Reduce bottom exposure
- Increase the Z offset slightly, if possible
- Check that the plate is level
The Plate Does Not Move Smoothly
- Check for cured resin or dirt on the lead screw
- Clean and lightly lubricate the lead screw
- Check that screws and the coupler are tight
- Contact support if the problem continues
Prints Have Horizontal Lines or Banding
- Check for Z-axis wobble
- Clean and lubricate the lead screw
- Check for loose parts
- Make sure the printer sits on a stable surface
- Check the plate arm
The Paper Tears or Gets Stuck
- The plate may be too low, or the screws uneven
- Re-level, tighten evenly, and try again
- Make sure the paper is clean and flat
Common Mistakes to Avoid
- Skipping leveling after changing the film or vat
- Leveling with a dirty plate or screen
- Tightening screws unevenly
- Overtightening screws
- Using the wrong thickness of paper
- Pressing hard on the screen
- Forgetting to confirm the Z zero setting
- Changing several settings at once
- Skipping the test print
- Ignoring a worn film or aging screen
- Not cleaning cured resin from the lead screw and plate arm
Quick Leveling Checklist
Before leveling
- Printer off and safe
- Gloves and eye protection on
- Plate, film, vat, and screen clean
- Allen keys and paper ready
Leveling
- Vat removed
- Plate screws loosened
- Paper placed flat on the screen
- Z zero set and plate settled
- Screws tightened evenly, not overtightened
- Z zero confirmed
After leveling
- Paper removed and screen wiped
- Vat reinstalled
- First-layer test printed
- Results checked and adjusted if needed
Maintenance
- Lead screw cleaned and lightly lubricated
- Rails and plate arm checked
- Film and screen inspected
- Re-level after any change or bump
FAQ
How do I level a resin printer build plate?
Loosen the plate screws, place a sheet of paper on the screen, lower the plate to Z zero so it settles flat, tighten the screws evenly, and confirm the Z zero position. Always follow your printer’s manual.
What paper should I use for leveling?
Standard printer paper is common, often around 80 gsm. Some manufacturers recommend a different thickness, so check your manual.
How often should I level my build plate?
Level it after setup, after changing the film, vat, or screen, after any bump or crash, and whenever prints start failing for no clear reason.
What is Z zero?
It is the reference position where the bottom of the build plate meets the release film or screen. The printer uses it to know how high to start each print.
Why does my print stick to the film instead of the plate?
Common causes include a Z zero set too high, a tilted plate, a dirty plate, weak bottom exposure, a worn film, or cold resin. Re-level and check each in turn.
Why is the bottom of my print squashed?
The plate may be too close to the film, or the bottom exposure may be too high. Check Z zero and exposure settings.
Do I need to level after every print?
No. Once leveled and locked, the plate usually stays in position. Re-level when something changes or when problems appear.
Can I level with the vat in place?
Some printers use a method with the vat in place, but the paper method on the screen is common. Follow your manufacturer’s procedure.
How tight should I make the plate screws?
Firm, but not overtightened. Tighten gradually and evenly, and avoid forcing them.
Do I need to calibrate the Z-axis, or just level the plate?
For most printers, setting Z zero is part of the leveling process. If you have Z-axis movement problems, such as wobble or banding, you may also need to clean, lubricate, and check the Z-axis hardware.
Conclusion
Calibrating the Z-axis and leveling the build plate is one of the simplest, cheapest, and most effective things you can do to improve your resin prints.
Start with a clean plate, film, and screen. Loosen the plate screws, use a flat sheet of paper to set Z zero, tighten the screws evenly, and confirm the setting. Then run a first-layer test and adjust if needed. Keep the Z-axis clean and lightly lubricated, and re-level after any change or bump. Do this consistently and you will see stronger first layers, fewer failures, and more accurate prints.
If you are looking for a reliable printer, spare parts, or accessories, explore our range of resin 3D printers and materials at MCast 3D. If you are not sure which printer or part suits your work, contact our team and we will help you choose.